Grow and Pickle Your Own Garlic
Views: 6730
Growing your own garlic really is a remarkable thing.
From one small clove in October, I can harvest one fat head with 12 cloves in midsummer. The garlic knows how to do this without any coaxing, intervention, fussing, or worrying from me. It happily sends up shoots through the winter and yields garlic delights throughout the growing season.
First there are garlic chives in January, clipped even in the snow. Then green garlic in April and May and full, ripe heads at the end of July or early August. The garlic does all of this work while looking pretty in the garden. The green vertical shoots are attractive until the end of July, when the leaves begin to turn brown and fall over, signaling that it’s time to harvest the mature cloves.
Grow & Harvest Garlic
Dig the bulbs with a trowel or garden fork, being careful not to slice through any of the garlic, then gently lift out the garlic. I inevitably get the trowel too close to the garlic and cut through a few. If this happens to you, use the garlic immediately, because you won’t be able to store damaged heads. Remove as much of the soil as possible with your hands; don’t use water. Cure the garlic by hanging it in small bunches for two weeks. (Don’t worry, fresh garlic doesn’t have an odor as it cures. I keep mine in a large basket in a well ventilated room, out of direct sunlight, which right now happens to be my family room.)
What am I going to do with all of this garlic? A few large bulbs will be kept for seeding next year. Some will be cured for long storage. The rest will be used to cook with now (fresh pesto, for example). I found this pickled garlic recipe from the Ball Complete Book of Home Preserving: 400 Delicious and Creative Recipes for Today, edited by Judi Kingry and Lauren Devine. This recipe uses most of my garlic. Next fall, I’ll have to plant more.
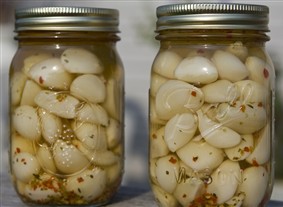
Recipe: Pickled Garlic
Makes about five 8-ounce jars or two 16-ounce jars
1 cup dry white wine
2-1/2 cups white vinegar
1 Tbsp pickling or canning salt
12 large heads garlic, separated and peeled
1 Tbsp granulated sugar
1 Tbsp dried oregano
5 dried chili peppers (optional)
1. Prepare canner, jars, and lids.
2. In a large stainless steel saucepan, combine vinegar, wine, salt, sugar, and oregano. Bring to a boil over medium-high heat, stirring to dissolve sugar. Reduce heat and boil gently for 1 minute. Add garlic and cook for 1 minute.
3. Pack garlic and 1 chili pepper, if using, into hot jars to within a generous 1/2 inch of top of jar. Ladle hot pickling liquid into jar to cover garlic, leaving 1/2 inch headspace. Remove air bubbles and adjust headspace, if necessary, by adding hot pickling liquid. Wipe rim. Center lid on jar. Screw band down until resistance is met, then increase to fingertip-tight.
4. Place jars in canner, ensuring they are completely covered with water. Bring to boil and process for 10 minutes. Remove canner lid. Wait 5 minutes, then remove jars, cool and store.
Meet Jennifer Bartley
Jennifer Bartley grew up on a ravine near an ancient Indian mound. She remembers spending glorious childhood days picking wildflowers and playing in an old,…
Jennifer's Recent Posts
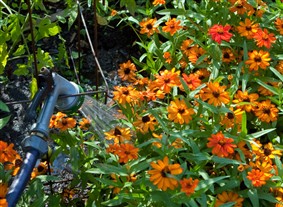
Hand Watering the Kitchen Garden
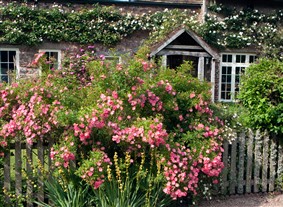
Creating Enclosed Gardens
Jennifer's Videos


Membership Has Its Perks

- Ask The Expert Questions
- Newsletter Archive
- PlantersPlace Magazine
- Members Photo Gallery
- Product Ratings & Reviews
- Garden Club Samples
More information about edible gardening that you’re going to want

Edible Gardening Videos

Edible Gardening Podcasts

Got a Edible Gardening Question?