Using a Weed Barrier in the Vegetable Garden (for the first time)
Views: 12502
This spring I have a client that last used my gardening services for their raised vegetable beds two years ago. They did not one bit of work in those 10 beds since I last touched them in October 2015.
“Hello, Ellen!” they said. “Yes, well …. We missed the wonderful fresh food that we had with the garden, and we’re hoping you might like to install the gardens again,” they said somewhat sheepishly. I understood the sheepishness when I stopped by to discuss what they’d like done for this year.
All 10 beds were filled with weeds. I’m no weed expert, but I typically put weeds into two or three categories: easily pulled, more difficult taproot weeds like dandelions, and weeds that arise from lengths and lengths of stolons or underground stems. Think mint, grasses or some of the morning glory-looking plants in the Convolvulus family. That last category is THE WORST. And six of the 10 beds were ravaged by that type of weed.
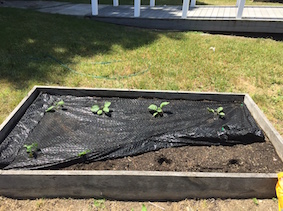
After convincing the client that four beds for this year would be quite enough for now, I set about removing the weeds from the four beds that had minimal stoloniferous weeds. Wanting to keep the beds as weed-free as possible for as long as possible, I decided to install landscape fabric or a weed barrier on top of the four beds.
This is the first time I’ve used a weed barrier. I usually use mulch to keep weeds down, pulling out the weeds as they grow through the mulch. With those underground roots laying in wait, mulch wouldn’t do a sufficient job. The weed barrier provides an impervious wall, if you will, that keeps the weeds from growing up. The material does allow water to soak through, so that’s a good thing.
Here’s how I set up the beds:
- The fabric width is 4 ft., same as the raised beds. I unrolled and cut the fabric to hang over the sides just a bit, and secured the fabric with (separately sold) landscape fabric pegs. This is key! The fabric needs to be secured.
- I planned where my plants would go within the bed.
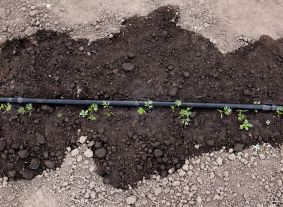
- I cut holes in the barrier—in an X or a T shape—where those plants would be placed. Then, I drove my trowel into the X and through the soil.
- Working in one quadrant of the bed at a time, I lifted the fabric, found those disturbances in the soil, and dug holes for the plants (and threw some fertilizer into the hole for good measure).
- With the fabric still loosely lifted, I inserted a plant through the cut in the fabric and into the hole, one hand holding the plant and the other hand under the fabric to guide the plant into the hole. Once in the hole, I used two hands to tamp in the plant and make sure it was happy.
- After the plants in that quadrant were planted, I then secured that corner of the fabric into the soil.
- After all the plants were in, I watered thoroughly.
Now, I’m not naïve enough to believe I won’t have any weeds in those beds. There are multiple points were the weeds can creep up—through those Xs and Ts cut into the fabric, along the edges where the fabric and bed edge meet, and eventually maybe even up through the fabric (weeds are strong!). The barrier is giving the plants a chance to reach a height and age where they are ready to compete against weeds for space, light, nutrients and water.
Again, this is my first time using a weed barrier. Stay tuned to see if it’s the best thing since sliced bread or it’s an epic failure!
Meet Ellen Wells
When you’re raised on a farm, you can’t help but know a thing or two about gardening. Ellen Wells is our expert on edible gardening.…
Ellen's Recent Posts
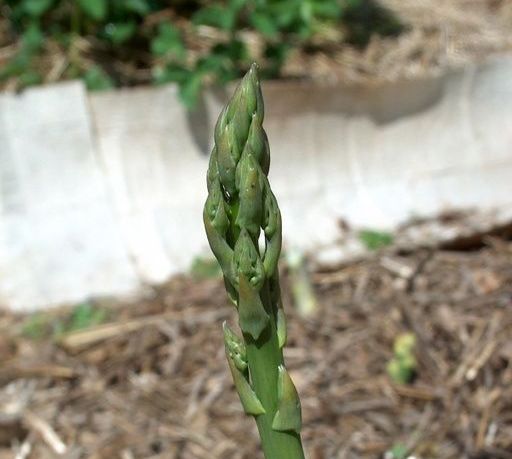
Asparagus
Climate Change, Warming Temperatures and Your Garden
Membership Has Its Perks

- Ask The Expert Questions
- Newsletter Archive
- PlantersPlace Magazine
- Members Photo Gallery
- Product Ratings & Reviews
- Garden Club Samples
More information about edible gardening that you’re going to want

Edible Gardening Videos

Edible Gardening Podcasts

Got a Edible Gardening Question?